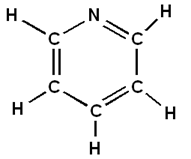
Building Pyridine: Using Untyped Atoms
The following is an example of how Pyridine is built in GaussView:
1. Start a new file by selecting the New option from the File menu in theView window.
2. Select Rings on the Builder window.
3. Click on the Active Fragment button. Select benzene from the ring fragments.
4. Return to the View window. Click once: benzene displays.
5. Click on Element on the Builder window. Click on nitrogen.
6. Click on the Active Fragment display. Click on the Nitrogen atom.
7. In the View window, click on the carbon atom you want to change to nitrogen.
 Do not select one of the hybridizations. It is usually easier to use untyped atoms.
8. Select the Delete Atom button on the Builder window.
9. On the View window, delete the hydrogen attached to the nitrogen by clicking on it.
10. Click on the Rebond button on the Builder window, then click on the Clean button.
You will often want to rebond before cleaning.
Pyridine is now complete.
Building Phenylpyridine: Setting the Angle Between Rings

This example shows how to build Phenylpyridine based on an existing file, in this case, Pyridine.
1. We will be continuing from the previous example, Building Pyridine.
2. Click on Rings on the Builder window. Be sure that the phenyl ring is selected.
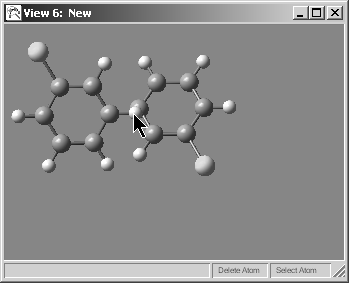
3. Click on the hydrogen atom located on the carbon atom opposite the nitrogen atom on the View window. A second ring is displayed on the screen.
4. Select the Dihedral button on the Builder window. Make sure that Move Group is checked.
5. Select atoms between the two rings, as shown in the following figure
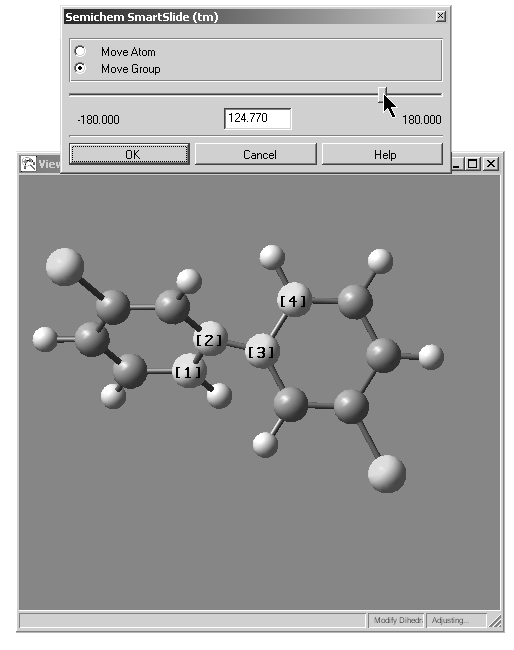
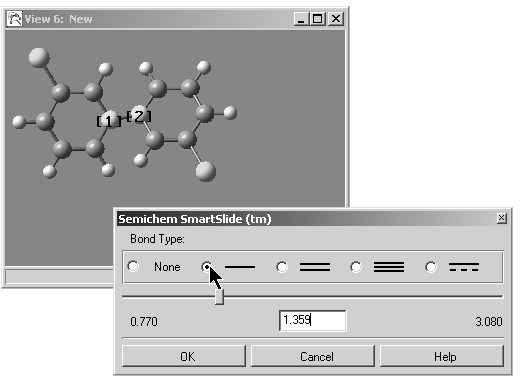
Modifying the Dihedral Angle
6. Move the slider to create a dihedral until the rings are perpendicular to each other (or enter 90.0 in the text box).
7. Click on the OK button.
Phenylpyridine is now complete.
Building Iron Pentacarbonyl: Selecting the Best Templates for a Given Task
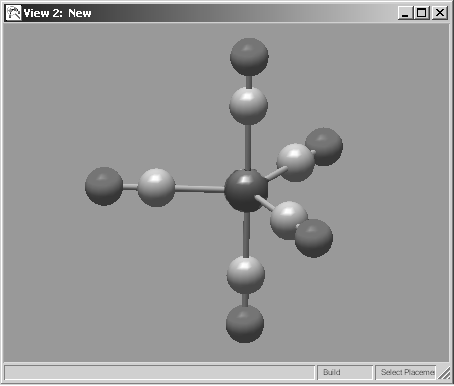
This example builds iron pentacarbonyl.
1. Open a new model. Select the element iron and then choose the bi-pyramidal iron template:

2. Select the linear C-N template and place this group on each bond to the iron atom. Note that we select this template rather than one of the C-O groups because it is linear.
3. Change the nitrogen atoms to oxygen atoms (select the element oxygen and then the free atom template).
The molecule is now complete.
Building Tyrian Purple Dye: Appending a Structure
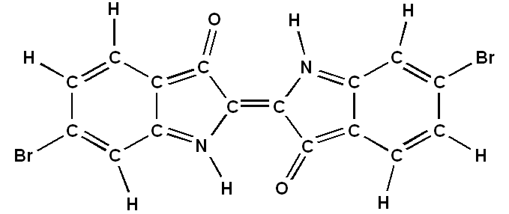
The following is an example of how a Tyrian purple dye 6,6'-dibromoindigo is built in GaussView:
1. Create a new file.
 2. Select the fused 5 and 6 carbon rings on the Builder window (see illustration at left) then click on the View window to place a fragment.
3. Select the oxygen element and change the appropriate hydrogen atom in the five-member ring to oxygen by clicking on it.
4. Change the carbon atom opposite the oxygen to nitrogen.
5. Change the hydrogen atom on the outermost carbon atom in the six-member ring (on the same side as the nitrogen) to Bromine in a similar manner.
6.Select Clean on the Builder window. Do not rebond. Then save the file.
7. Append the file you just saved to the display on the View window.
8. Rotate and move the second ring so that the two carbon atoms to be bonded are close together, and the two fragments are oriented properly with respect to one another.
 To affect just one of the two fragments, hold down the Alt key while dragging the mouse. Using a second window is often helpful when performing complex positioning operations. Use the Add View option on the View menu to create one.
9. Delete the hydrogen atoms on the two carbon atoms to be bonded.
10. Select Bond on the Builder window then create a double bond between the two carbon atoms.
11. Click on Clean.
The 6,6'-dibromoindigo molecule is now complete.
Docking Two Structures: Building Bichloro-Diphenyl
This example illustrates a method for building a molecular structure consisting of docked framents.
1. Create a new View window and place a benzene ring in it. Change one of the carbon atoms to Chlorine. Repeat this process to create a second chlorobenzene ring.
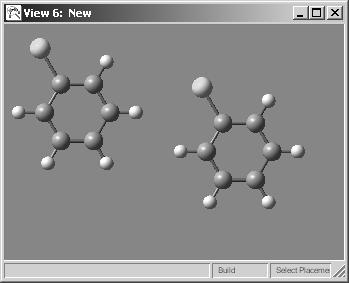
2. Rotate one of the rings so that the chlorine atom is in the opposite position to the one in the first ring. You can accomplish this by holding down the Alt key while holding down the left mouse button and dragging:
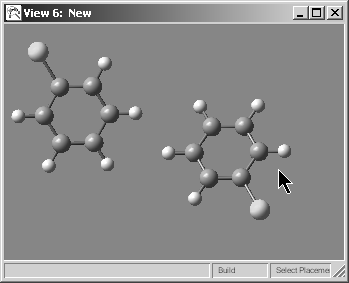
3. Position the rings so that they overlap and the carbon atoms to be bonded are in correct position:
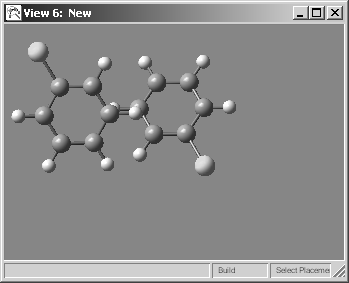
4. Delete the hydrogen atoms and dangling bonds in the overlap region:
5. Create a bond between the two carbon atoms, completing the molecule:
The molecule is now complete.
Assigning Atoms to ONIOM Layers in a Small Peptide Chain
Note: This example is devised for its illustrative clarity rather than for scientific interest.
1. Create a peptide chain containing these amino acids: Phe-Ala-Gly. Choose the Amino-Terminal Phenylalanine, Central Fragment Alanine and Carboxyl-Terminal Glycine.
2. Assign all atoms to the Low Layer. Select Assign Layer from the Edit menu, and then click Select All. Verify that current layer is set to Low. The display will look similar to the following figure.
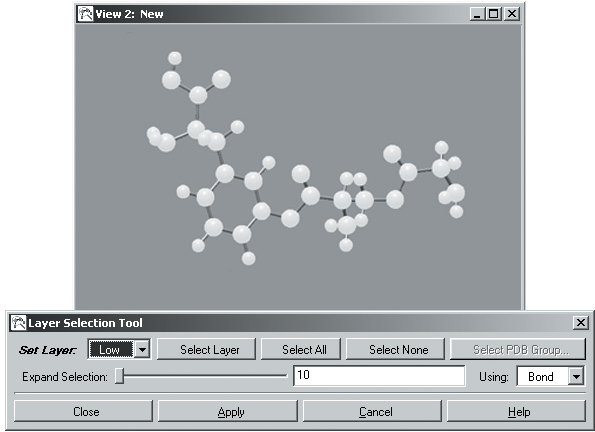
Click Apply.
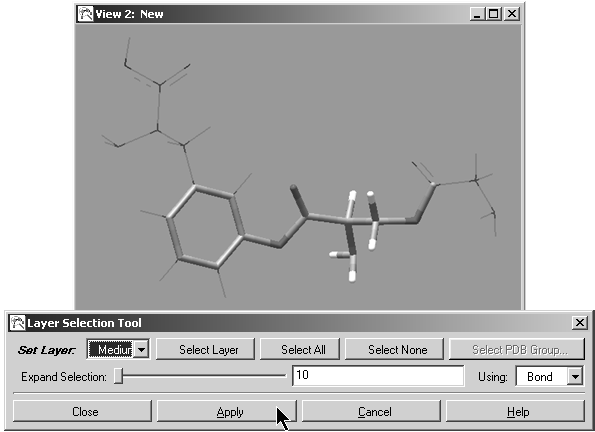
3. Assign the following atoms to the Medium layer: all atoms in Ala, carbons in Ring in Phe and atoms up to the double bond in Gly:
Select the central carbon atom in Ala. Click in the right end of Expand Selection and add more atoms (two or more times). Adding too few atoms is usually easier than adding too many. Click Apply.
Add additional atoms (select and then click Apply) as necessary until the selection is correct as in the following figure. Use the center mouse button to add atoms to the selection as needed, and then click Apply to confirm, repeating as needed.
The atoms in the Medium layer are now displayed as tubes and the ones in the Low layer are in wireframe in the display:
4. Assign the following atoms to the High layer: all atoms in Ala, including heavy atoms bonded to them. Click the central carbon in Ala. Change Using field to Distance. Click twice at the right end of Expand selection. The display will be as in the following figure:
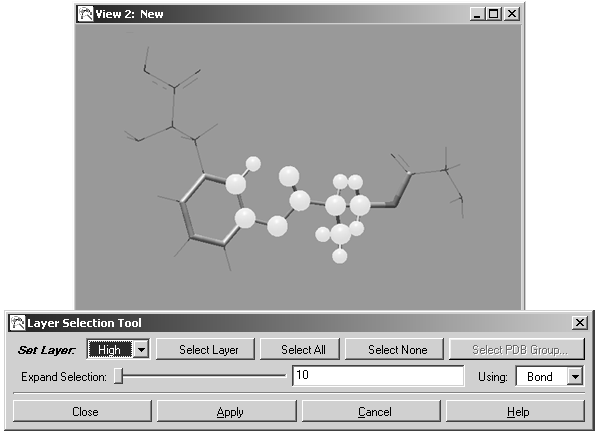
Click Apply. The display is as in the following figure:
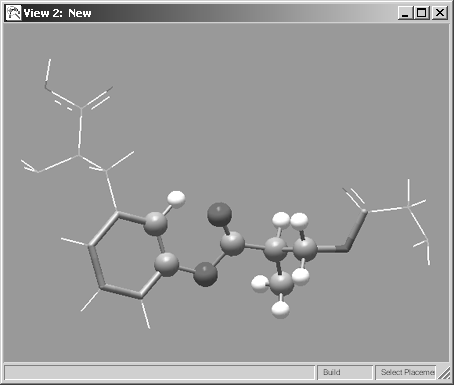
Completed ONIOM-Assigned Molecule
Remove the hydrogen atom that was just placed into the high layer by selecting it and then placing it in the Medium layer.
Click Close.
The atom layer assignment is now complete.
Setting Up an ONIOM Job
This example uses the molecule that was built and the layers that were defined in the final example in the Building Tutorial, and it continues on from those steps.
1. Select Gaussian from the Calculate menu.
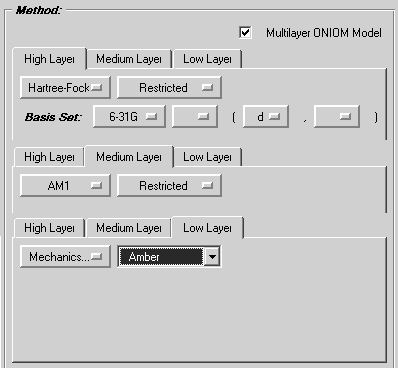
2. Click on Multilayer ONIOM Model. Three tabs appear (High, Medium, and Low) in the Method section, which you can use to select the methods for treating each layer of atoms.
3. Click on the High tab, then select an RHF/6-31G job.
4. Click on the Medium tab, then select a Restricted AM1 job.
5. Click on the Low tab and specify a molecular mechanics calculation using the Amber force field.
6. The following figure (Gaussian ONIOM Job Setup Example) shows these three tabs in the correct settings (superimposed below one another):
These settings place the following line in the job's route section:
# ONIOM=(RHF/6-31G:RAM1:Amber)
You can now go on to fill out the rest of the dialog box, and the job will be ready to be saved and run.