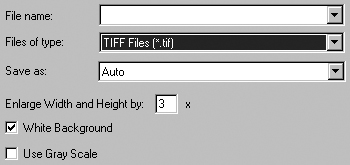
Figure 24. GaussView Fields in the Save Image Dialog
These fields are added to the standard system Save dialog by GaussView.
The Edit=>Capture Image menu path may be used to capture the image in the current view windows to the system clipboard (from which it may be pasted into another application). The File=>Save Image menu item and the Save Image button allow you to save an image to an external file. They use the system Save dialog, with some additional fields as shown in Figure 24.
The Files of type field acts as usual as a filter determining what files are displayed in the file list. The Save as field specifies the kind of graphics file to be produced (by default, this is determined from file extension). The available files types are TIFF, JPEG, vector-based EPS, Windows Bitmap and PNG. In general, we recommend selecting TIFF for later high resolution printing and selecting JPEG or PNG for use on the web or in presentations.

Figure 24. GaussView Fields in the Save Image Dialog
These fields are added to the standard system Save dialog by GaussView.
The other GaussView fields in the dialog have the following meanings
Enlarge Width and Height by: Enlarge the image by uniform scaling in order to increase its physical size and/or graphical resolution (the default value is 3x). Use a factor of 4 if you plan to ultimately print the image at 300 dpi (at its current size). If you also want to increase the image size, you must also include this factor. Thus, to save the current image at 300 dpi at twice its current size, you would use an enlargement factor of 8. Note that the computation time for rendering increases as the square of the enlargement factor.
White Background: Use a white background. The background in its view window is used if this item in unchecked.
Use Gray Scale: Convert the image to gray scale (black and white) before saving. The default is to save a color image.
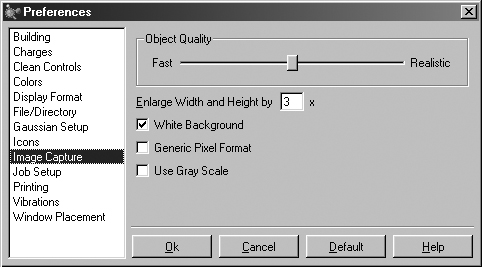
Both the image capture and image saving are subject to the settings in the Image Capture preferences, shown in Figure 25. Printed images are also affected by the Object Quality and Generic Pixel Format settings.
The fields in this panel have the following meanings:
Object Quality: Specifies the image quality. Moving the slider toward the Realistic end of the scale increases the file size and the time required to generate the image file.
Enlarge Width and Height by: Set the default image scaling factor (as above).
White Background: Use a white background (the default). The background in its view window is used if this item in unchecked.
Generic Pixel Format: Use the system software renderer. This option should be checked only after rendering problems/failures have been encountered during image capture or printing.
Use Gray Scale: Convert the image to gray scale (black and white) before capturing. The default is to save a color image.

Figure 25. Image Capture Preferences
This panel allows you to set defaults for image captures.